outlineElement
A table of contents, figures, or other elements.
This function generates a list of all occurrences of an element in the
document, up to a given depth. The element's numbering
and page number will be displayed in the outline alongside its title or
caption.
Example
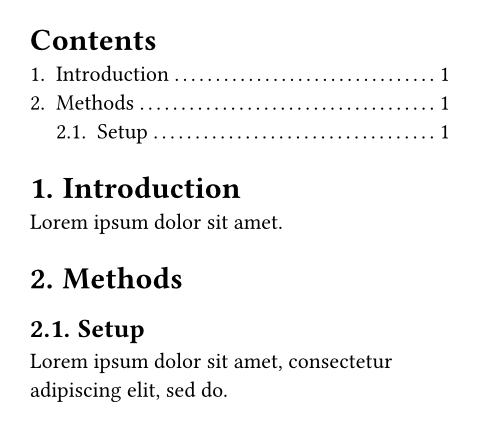
#set heading(numbering: "1.")
#outline()

= Introduction
#lorem(5)

= Methods
== Setup
#lorem(10)
Alternative outlines
In its default configuration, this function generates a table of contents.
By setting the target parameter, the outline can be used to generate a
list of other kinds of elements than headings.
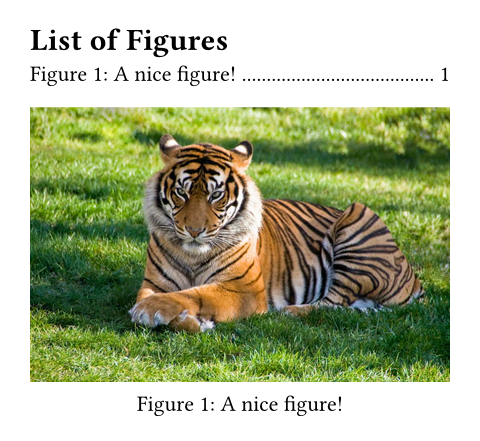
In the example below, we list all figures containing images by setting
target to figure.where(kind: image). Just the same, we could have set
it to figure.where(kind: table) to generate a list of tables.
We could also set it to just figure, without using a where
selector, but then the list would contain all figures, be it ones
containing images, tables, or other material.
#outline(
  title: [List of Figures],
  target: figure.where(kind: image),
)

#figure(
  image("tiger.jpg"),
  caption: [A nice figure!],
)
Styling the outline
At the most basic level, you can style the outline by setting properties on it and its entries. This way, you can customize the outline's title, how outline entries are indented, and how the space between an entry's text and its page number should be filled.
Richer customization is possible through configuration of the outline's entries. The outline generates one entry for each outlined element.
Spacing the entries
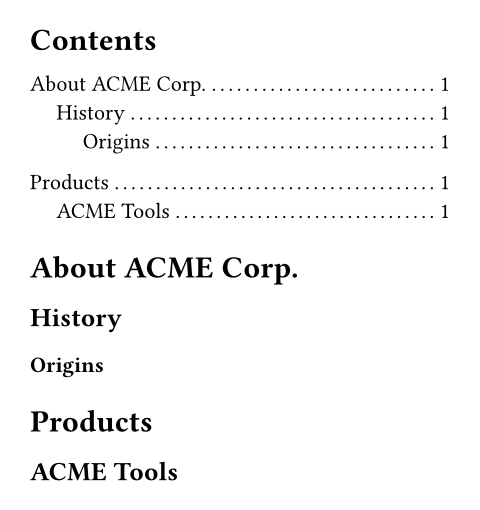
Outline entries are blocks, so you can adjust the spacing between them with normal block-spacing rules:
#show outline.entry.where(
  level: 1
): set block(above: 1.2em)

#outline()

= About ACME Corp.
== History
=== Origins
= Products
== ACME Tools
Building an outline entry from its parts
For full control, you can also write a transformational show rule on
outline.entry. However, the logic for properly formatting and indenting
outline entries is quite complex and the outline entry itself only contains
two fields: The level and the outlined element.
For this reason, various helper functions are provided. You can mix and match these to compose an entry from just the parts you like.
The default show rule for an outline entry looks like this1:
#show outline.entry: it => link(
  it.element.location(),
  it.indented(it.prefix(), it.inner()),
)
-
The
indentedfunction takes an optional prefix and inner content and automatically applies the proper indentation to it, such that different entries align nicely and long headings wrap properly. -
The
prefixfunction formats the element's numbering (if any). It also appends a supplement for certain elements. -
The
innerfunction combines the element'sbody, the filler, and thepagenumber.
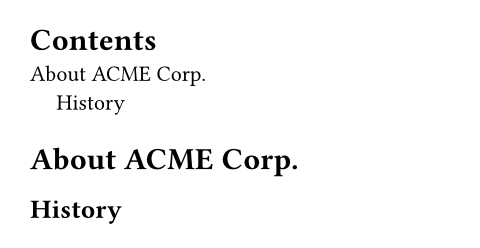
You can use these individual functions to format the outline entry in different ways. Let's say, you'd like to fully remove the filler and page numbers. To achieve this, you could write a show rule like this:
#show outline.entry: it => link(
  it.element.location(),
  // Keep just the body, dropping
  // the fill and the page.
  it.indented(it.prefix(), it.body()),
)

#outline()

= About ACME Corp.
== History
The outline of equations is the exception to this rule as it does not have a body and thus does not use indented layout.
Parameters
title
The title of the outline.
- When set to
auto, an appropriate title for the text language will be used. - When set to
none, the outline will not have a title. - A custom title can be set by passing content.
The outline's heading will not be numbered by default, but you can
force it to be with a show-set rule:
show outline: set heading(numbering: "1.")
Default: auto
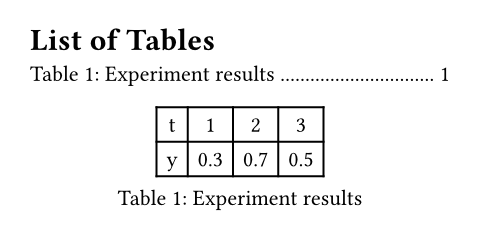
target
The type of element to include in the outline.
To list figures containing a specific kind of element, like an image or
a table, you can specify the desired kind in a where
selector. See the section on alternative outlines
for more details.
 View example
#outline(
  title: [List of Tables],
  target: figure.where(kind: table),
)

#figure(
  table(
    columns: 4,
    [t], [1], [2], [3],
    [y], [0.3], [0.7], [0.5],
  ),
  caption: [Experiment results],
)
Default: heading
depth
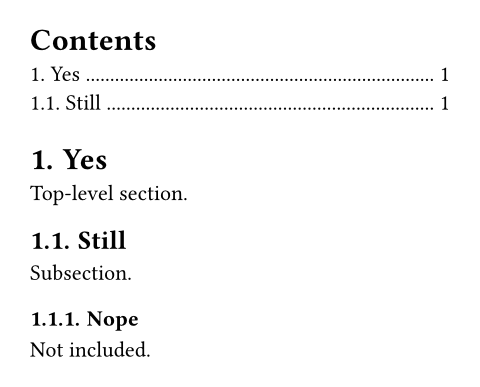
The maximum level up to which elements are included in the outline. When
this argument is none, all elements are included.
 View example
#set heading(numbering: "1.")
#outline(depth: 2)

= Yes
Top-level section.

== Still
Subsection.

=== Nope
Not included.
Default: none
indent
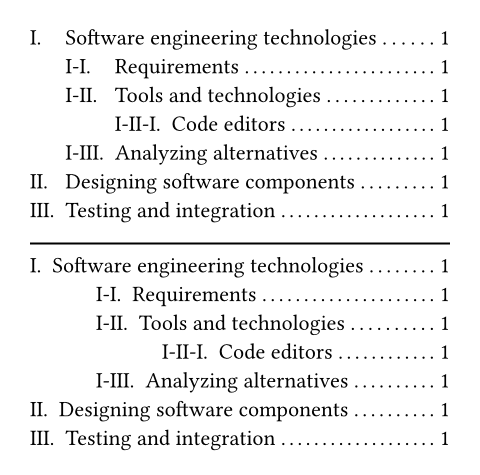
How to indent the outline's entries.
-
auto: Indents the numbering/prefix of a nested entry with the title of its parent entry. If the entries are not numbered (e.g., via heading numbering), this instead simply inserts a fixed amount of1.2emindent per level. -
Relative length: Indents the entry by the specified length per nesting level. Specifying
2em, for instance, would indent top-level headings by0em(not nested), second level headings by2em(nested once), third-level headings by4em(nested twice) and so on. -
Function: You can further customize this setting with a function. That function receives the nesting level as a parameter (starting at 0 for top-level headings/elements) and should return a (relative) length. For example,
n => n * 2emwould be equivalent to just specifying2em.
 View example
#set heading(numbering: "I-I.")
#set outline(title: none)

#outline()
#line(length: 100%)
#outline(indent: 3em)

= Software engineering technologies
== Requirements
== Tools and technologies
=== Code editors
== Analyzing alternatives
= Designing software components
= Testing and integration
Default: auto
Definitions
entryElement
Represents an entry line in an outline.
With show-set and show rules on outline entries, you can richly customize the outline's appearance. See the section on styling the outline for details.
level
The nesting level of this outline entry. Starts at 1 for top-level
entries.
element
The element this entry refers to. Its location will be available
through the location method on the content
and can be linked to.
fill
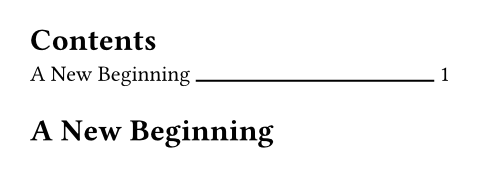
Content to fill the space between the title and the page number. Can be
set to none to disable filling.
The fill will be placed into a fractionally sized box that spans the
space between the entry's body and the page number. When using show
rules to override outline entries, it is thus recommended to wrap the
fill in a box with fractional width, i.e.
box(width: 1fr, it.fill).
When using repeat, the gap property can be useful
to tweak the visual weight of the fill.
 View example
#set outline.entry(fill: line(length: 100%))
#outline()

= A New Beginning
Default: repeat(body: [.], gap: 0.15em)
Definitions
of entry
indentedContextual
A helper function for producing an indented entry layout: Lays out a prefix and the rest of the entry in an indent-aware way.
If the parent outline's indent is auto, the
inner content of all entries at level N is aligned with the prefix of
all entries at level N + 1, leaving at least gap space between the
prefix and inner parts. Furthermore, the inner contents of all entries
at the same level are aligned.
If the outline's indent is a fixed value or a function, the prefixes are
indented, but the inner contents are simply offset from the prefix by
the specified gap, rather than aligning outline-wide. For a visual
explanation, see outline.indent.
prefix
The prefix is aligned with the inner content of entries that
have level one less.
In the default show rule, this is just it.prefix(), but it can be
freely customized.
inner
The formatted inner content of the entry.
In the default show rule, this is just it.inner(), but it can be
freely customized.
gap
The gap between the prefix and the inner content.
Default: 0.5em
prefixContextual
Formats the element's numbering (if any).
This also appends the element's supplement in case of figures or
equations. For instance, it would output 1.1 for a heading, but
Figure 1 for a figure, as is usual for outlines.
innerContextual
Creates the default inner content of the entry.
This includes the body, the fill, and page number.
body
The content which is displayed in place of the referred element at its
entry in the outline. For a heading, this is its
body; for a figure a caption and for equations, it is
empty.
pageContextual
The page number of this entry's element, formatted with the numbering set for the referenced page.