Page Setup Guide
Your page setup is a big part of the first impression your document gives. Line lengths, margins, and columns influence appearance and legibility while the right headers and footers will help your reader easily navigate your document. This guide will help you to customize pages, margins, headers, footers, and page numbers so that they are the right fit for your content and you can get started with writing.
In Typst, each page has a width, a height, and margins on all four sides. The top and bottom margins may contain a header and footer. The set rule of the page element is where you control all of the page setup. If you make changes with this set rule, Typst will ensure that there is a new and conforming empty page afterward, so it may insert a page break. Therefore, it is best to specify your page set rule at the start of your document or in your template.
#set rect(
width: 100%,
height: 100%,
inset: 4pt,
)
#set page(
paper: "iso-b7",
header: rect(fill: aqua)[Header],
footer: rect(fill: aqua)[Footer],
number-align: center,
)
#rect(fill: aqua.lighten(40%))
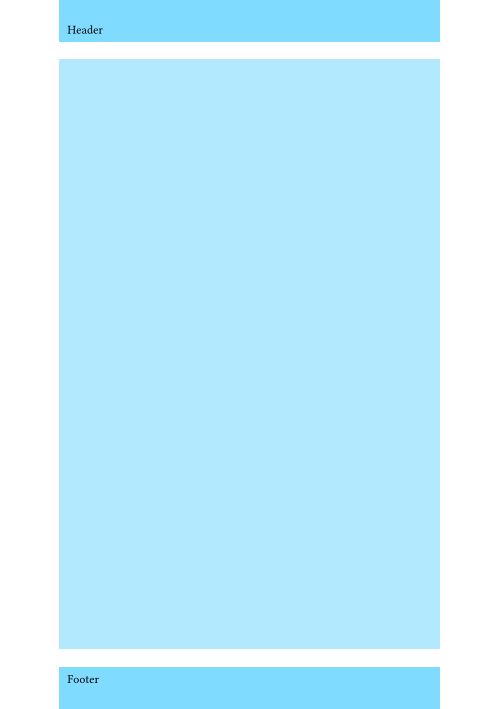
This example visualizes the dimensions for page content, headers, and footers. The page content is the page size (ISO B7) minus each side’s default margin. In the top and the bottom margin, there are stroked rectangles visualizing the header and footer. They do not touch the main content, instead, they are offset by 30% of the respective margin. You can control this offset by specifying the header-ascent and footer-descent arguments.
Below, the guide will go more into detail on how to accomplish common page setup requirements with examples.
Customize page size and margins
Typst’s default page size is A4 paper. Depending on your region and your use case, you will want to change this. You can do this by using the page set rule and passing it a string argument to use a common page size. Options include the complete ISO 216 series (e.g. "a4" and "iso-c2"), customary US formats like "us-legal" or "us-letter", and more. Check out the reference for the page’s paper argument to learn about all available options.
#set page("us-letter")
This page likes freedom.

If you need to customize your page size to some dimensions, you can specify the named arguments width and height instead.
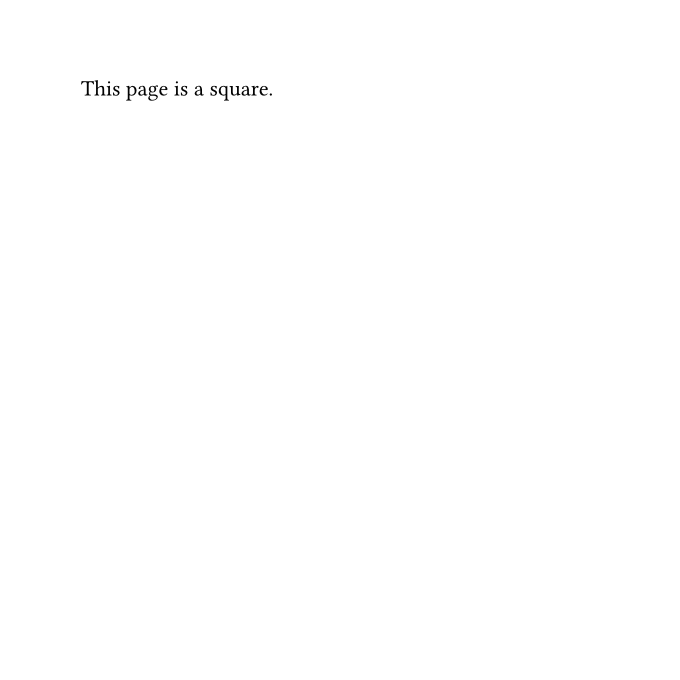
#set page(width: 12cm, height: 12cm)
This page is a square.
Change the page’s margins
Margins are a vital ingredient for good typography: Typographers consider lines that fit between 45 and 75 characters best length for legibility and your margins and columns help define line widths. By default, Typst will create margins proportional to the page size of your document. To set custom margins, you will use the margin argument in the page set rule.
The margin argument will accept a length if you want to set all margins to the same width. However, you often want to set different margins on each side. To do this, you can pass a dictionary:
#set page(margin: (
top: 3cm,
bottom: 2cm,
x: 1.5cm,
))
#lorem(100)
The page margin dictionary can have keys for each side (top, bottom, left, right), but you can also control left and right together by setting the x key of the margin dictionary, like in the example. Likewise, the top and bottom margins can be adjusted together by setting the y key.
If you do not specify margins for all sides in the margin dictionary, the old margins will remain in effect for the unset sides. To prevent this and set all remaining margins to a common size, you can use the rest key. For example, #set page(margin: (left: 1.5in, rest: 1in)) will set the left margin to 1.5 inches and the remaining margins to one inch.
Different margins on alternating pages
Sometimes, you’ll need to alternate horizontal margins for even and odd pages, for example, to have more room towards the spine of a book than on the outsides of its pages. Typst keeps track of whether a page is to the left or right of the binding. You can use this information and set the inside or outside keys of the margin dictionary. The inside margin points towards the spine, and the outside margin points towards the edge of the bound book.
#set page(margin: (inside: 2.5cm, outside: 2cm, y: 1.75cm))Typst will assume that documents written in Left-to-Right scripts are bound on the left while books written in Right-to-Left scripts are bound on the right. However, you will need to change this in some cases: If your first page is output by a different app, the binding is reversed from Typst’s perspective. Also, some books, like English-language Mangas are customarily bound on the right, despite English using Left-to-Right script. To change the binding side and explicitly set where the inside and outside are, set the binding argument in the page set rule.
// Produce a book bound on the right,
// even though it is set in Spanish.
#set text(lang: "es")
#set page(binding: right)
If binding is left, inside margins will be on the left on odd pages, and vice versa.
Add headers and footers
Headers and footers are inserted in the top and bottom margins of every page. You can add custom headers and footers or just insert a page number.
In case you need more than just a page number, the best way to insert a header and a footer are the header and footer arguments of the page set rule. You can pass any content as their values:
#set page(header: [
_Lisa Strassner's Thesis_
#h(1fr)
National Academy of Sciences
])
#lorem(150)
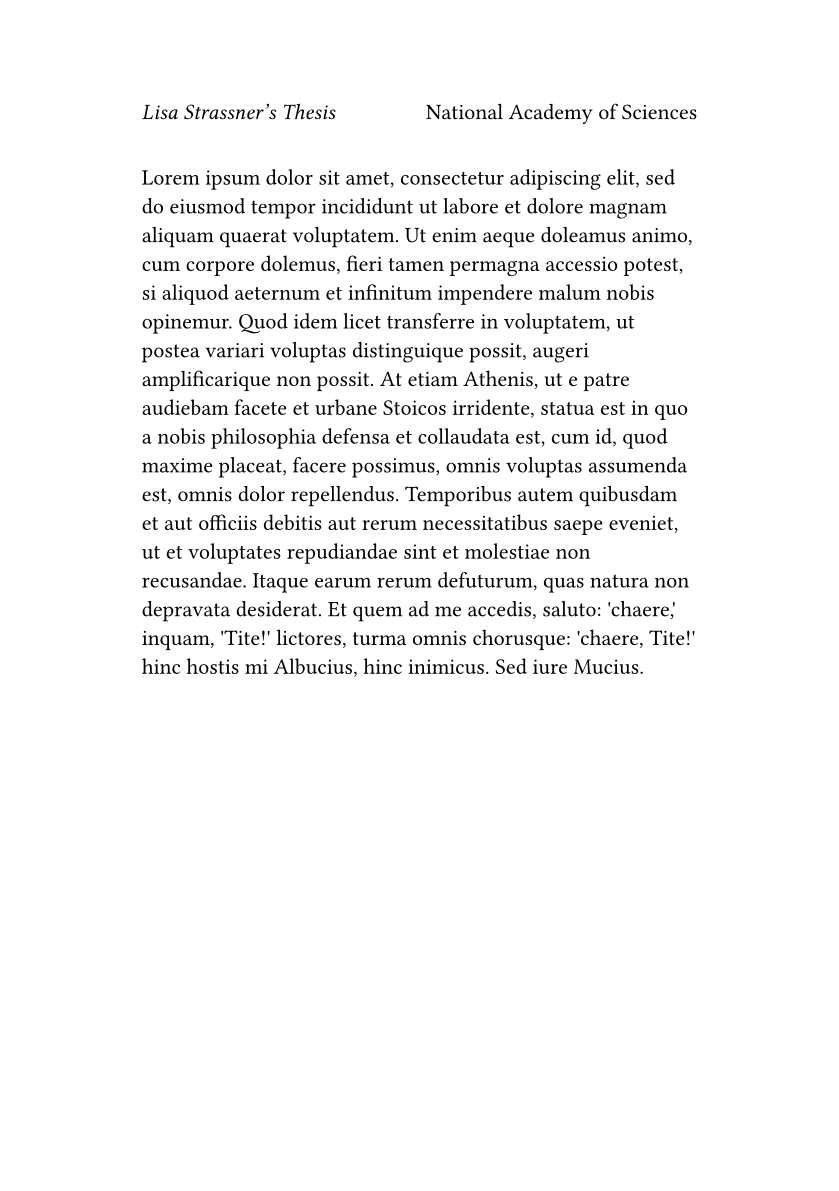
Headers are bottom-aligned by default so that they do not collide with the top edge of the page. You can change this by wrapping your header in the align function.
Different header and footer on specific pages
You’ll need different headers and footers on some pages. For example, you may not want a header and footer on the title page. The example below shows how to conditionally remove the header on the first page:
#set page(header: context {
  if counter(page).get().first() > 1 [
    _Lisa Strassner's Thesis_
    #h(1fr)
    National Academy of Sciences
  ]
})

#lorem(150)
This example may look intimidating, but let’s break it down: By using the context keyword, we are telling Typst that the header depends on where we are in the document. We then ask Typst if the page counter is larger than one at our (context-dependent) current position. The page counter starts at one, so we are skipping the header on a single page. Counters may have multiple levels. This feature is used for items like headings, but the page counter will always have a single level, so we can just look at the first one.
You can, of course, add an else to this example to add a different header to the first page instead.
Adapt headers and footers on pages with specific elements
The technique described in the previous section can be adapted to perform more advanced tasks using Typst’s labels. For example, pages with big tables could omit their headers to help keep clutter down. We will mark our tables with a <big-table> label and use the query system to find out if such a label exists on the current page:
#set page(header: context {
  let matches = query(<big-table>)
  let current = counter(page).get()
  let has-table = matches.any(m =>
    counter(page).at(m.location()) == current
  )

  if not has-table [
    _Lisa Strassner's Thesis_
    #h(1fr)
    National Academy of Sciences
  ]
})

#lorem(100)
#pagebreak()

#table(
  columns: 2 * (1fr,),
  [A], [B],
  [C], [D],
) <big-table>
Here, we query for all instances of the <big-table> label. We then check that none of the tables are on the page at our current position. If so, we print the header. This example also uses variables to be more concise. Just as above, you could add an else to add another header instead of deleting it.
Add and customize page numbers
Page numbers help readers keep track of and reference your document more easily. The simplest way to insert page numbers is the numbering argument of the page set rule. You can pass a numbering pattern string that shows how you want your pages to be numbered.
#set page(numbering: "1")
This is a numbered page.

Above, you can check out the simplest conceivable example. It adds a single Arabic page number at the center of the footer. You can specify other characters than "1" to get other numerals. For example, "i" will yield lowercase Roman numerals. Any character that is not interpreted as a number will be output as-is. For example, put dashes around your page number by typing this:
#set page(numbering: "— 1 —")
This is a — numbered — page.

You can add the total number of pages by entering a second number character in the string.
#set page(numbering: "1 of 1")
This is one of many numbered pages.

Go to the numbering function reference to learn more about the arguments you can pass here.
In case you need to right- or left-align the page number, use the number-align argument of the page set rule. Alternating alignment between even and odd pages is not currently supported using this property. To do this, you’ll need to specify a custom footer and query the page counter as described in the section on conditionally omitting headers and footers.
Custom footer with page numbers
Sometimes, you need to add other content than a page number to your footer. However, once a footer is specified, the numbering argument of the page set rule is ignored. This section shows you how to add a custom footer with page numbers and more.
#set page(footer: context [
*American Society of Proceedings*
#h(1fr)
#counter(page).display(
"1/1",
both: true,
)
])
This page has a custom footer.
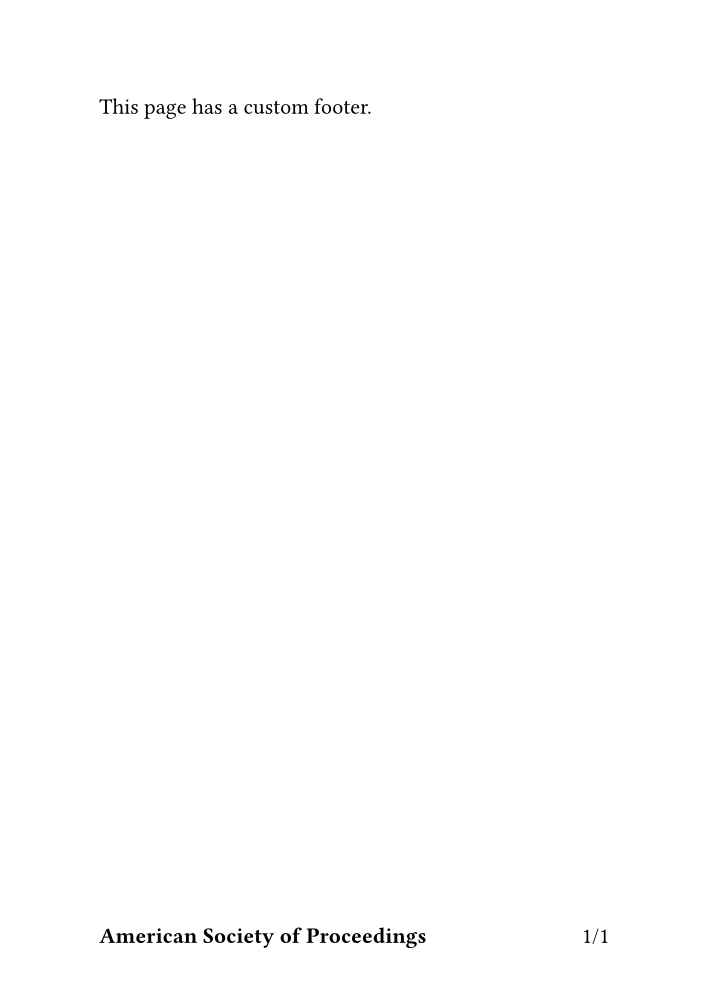
First, we add some strongly emphasized text on the left and add free space to fill the line. Then, we call counter(page) to retrieve the page counter and use its display function to show its current value. We also set both to true so that our numbering pattern applies to the current and final page number.
We can also get more creative with the page number. For example, let’s insert a circle for each page.
#set page(footer: context [
*Fun Typography Club*
#h(1fr)
#let (num,) = counter(page).get()
#let circles = num * (
box(circle(
radius: 2pt,
fill: navy,
)),
)
#box(
inset: (bottom: 1pt),
circles.join(h(1pt))
)
])
This page has a custom footer.
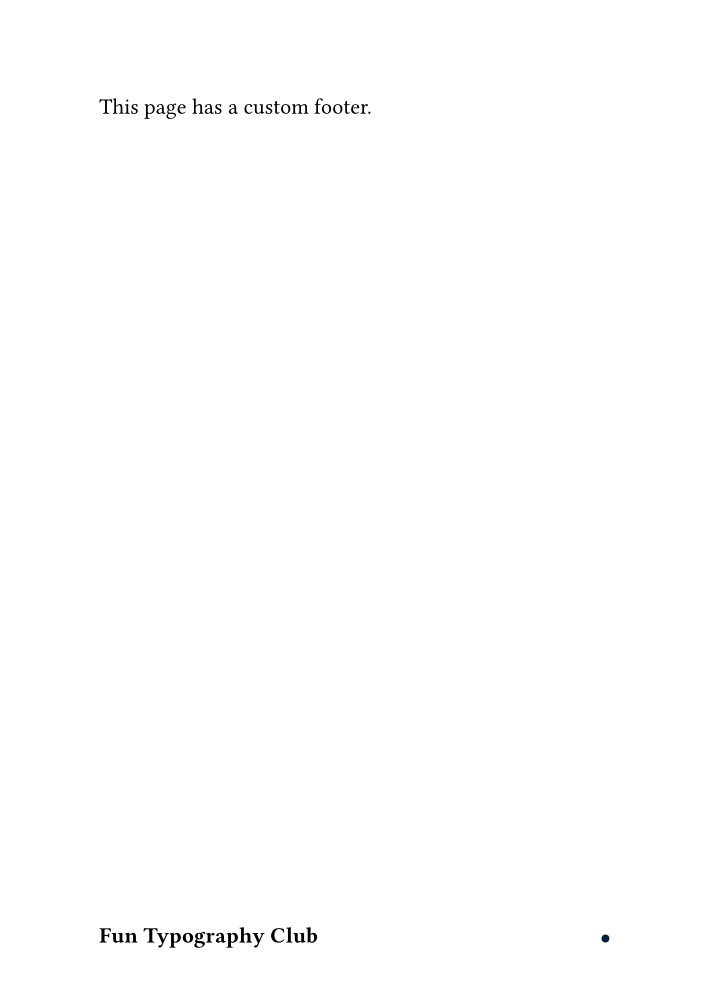
In this example, we use the number of pages to create an array of circles. The circles are wrapped in a box so they can all appear on the same line because they are blocks and would otherwise create paragraph breaks. The length of this array depends on the current page number.
We then insert the circles at the right side of the footer, with 1pt of space between them. The join method of an array will attempt to join the different values of an array into a single value, interspersed with its argument. In our case, we get a single content value with circles and spaces between them that we can use with the align function. Finally, we use another box to ensure that the text and the circles can share a line and use the inset argument to raise the circles a bit so they line up nicely with the text.
Reset the page number and skip pages
Do you, at some point in your document, need to reset the page number? Maybe you want to start with the first page only after the title page. Or maybe you need to skip a few page numbers because you will insert pages into the final printed product.
The right way to modify the page number is to manipulate the page counter. The simplest manipulation is to set the counter back to 1.
#counter(page).update(1)This line will reset the page counter back to one. It should be placed at the start of a page because it will otherwise create a page break. You can also update the counter given its previous value by passing a function:
#counter(page).update(n => n + 5)In this example, we skip five pages. n is the current value of the page counter and n + 5 is the return value of our function.
In case you need to retrieve the actual page number instead of the value of the page counter, you can use the page method on the return value of the here function:
#counter(page).update(n => n + 5)
// This returns one even though the
// page counter was incremented by 5.
#context here().page()

You can also obtain the page numbering pattern from the location returned by here with the page-numbering method.
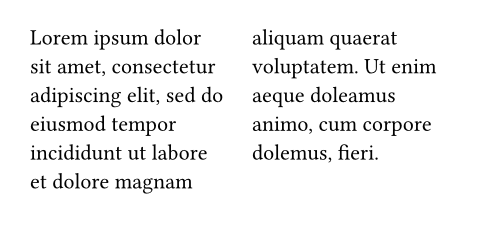
Add columns
Add columns to your document to fit more on a page while maintaining legible line lengths. Columns are vertical blocks of text which are separated by some whitespace. This space is called the gutter.
To lay out your content in columns, just specify the desired number of columns in a page set rule. To adjust the amount of space between the columns, add a set rule on the columns function, specifying the gutter parameter.
#set page(columns: 2)
#set columns(gutter: 12pt)
#lorem(30)
Very commonly, scientific papers have a single-column title and abstract, while the main body is set in two-columns. To achieve this effect, Typst’s place function can temporarily escape the two-column layout by specifying float: true and scope: "parent":
#set document(
title: [Impacts of Odobenidae],
)
#set page(columns: 2)
#set par(justify: true)
#place(
top + center,
float: true,
scope: "parent",
title(),
)
= About seals in the wild
#lorem(80)
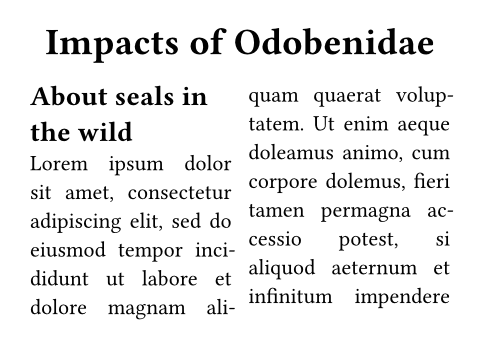
Floating placement refers to elements being pushed to the top or bottom of the column or page, with the remaining content flowing in between. It is also frequently used for figures.
Use columns anywhere in your document
To create columns within a nested layout, e.g. within a rectangle, you can use the columns function directly. However, it really should only be used within nested layouts. At the page-level, the page set rule is preferable because it has better interactions with things like page-level floats, footnotes, and line numbers.
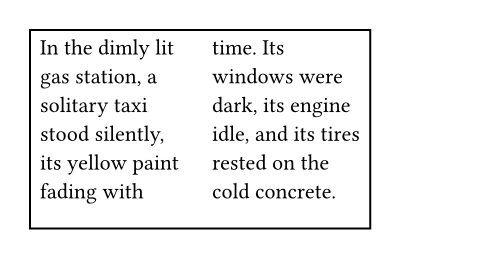
#rect(
width: 6cm,
height: 3.5cm,
columns(2, gutter: 12pt)[
In the dimly lit gas station,
a solitary taxi stood silently,
its yellow paint fading with
time. Its windows were dark,
its engine idle, and its tires
rested on the cold concrete.
]
)
Balanced columns
If the columns on the last page of a document differ greatly in length, they may create a lopsided and unappealing layout. That’s why typographers will often equalize the length of columns on the last page. This effect is called balancing columns. Typst cannot yet balance columns automatically. However, you can balance columns manually by placing #colbreak() at an appropriate spot in your markup, creating the desired column break manually.
One-off modifications
You do not need to override your page settings if you need to insert a single page with a different setup. For example, you may want to insert a page that’s flipped to landscape to insert a big table or change the margin and columns for your title page. In this case, you can call page as a function with your content as an argument and the overrides as the other arguments. This will insert enough new pages with your overridden settings to place your content on them. Typst will revert to the page settings from the set rule after the call.
#page(flipped: true)[
= Multiplication table
#table(
columns: 5 * (1fr,),
..for x in range(1, 10) {
for y in range(1, 6) {
(str(x*y),)
}
}
)
]
