Folders
As an established Typst user, you may have a lot of projects listed on your dashboard. As time goes by, it may become harder to find what you are looking for. A simple tool that can help here is the search box at the top of the dashboard.
However, it may be hard to remember the exact name of the project you are looking for, or being faced with all these items may feel overwhelming. Folders are a Typst Pro feature that helps to keep your project organized and find them more quickly.
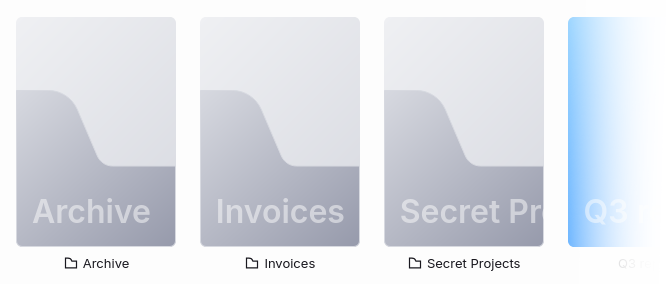
They work similarly to folders in file explorers or cloud storage software. They each have a name, can be nested, and contain as many projects as you like. However, they do not allow for specific access rights. If you want to share a specific set of projects with others, forming a team is the way to go.
Creating and navigating folders
Go to your personal or team dashboard. Above the project list, click the "New folder" button. Enter the folder name in the modal window, and confirm. Your folder will appear in the project list. Just like projects, folders are sorted using the selected settings (alphabetical, last created or last modified), but they will always be before projects in the list.
You can open the folder by clicking it once. When you are in a folder, creating a project or another folder will place it here.
To go higher up in the folder hierarchy, you can use the "Go to parent" button, next to the one to create a folder. You can also click directly on the parent you wish to go to in the path at the top of the page.

You can also use the "File" menu to quickly navigate folders. Put your cursor over a folder name to view its contents in a submenu, and click on a folder or project name to open it.
Moving projects and folders
There are two main ways you can move existing projects or folders to another
place. The first one is to open the settings modal for the project or folder you
want to move. For projects, move your cursor to the project's card and click the
![]() Cogwheel icon. For folders, first navigate to the folder and click the
"Folder settings" button that sits above the project list, next to "Go to
parent" and "New folder".
Cogwheel icon. For folders, first navigate to the folder and click the
"Folder settings" button that sits above the project list, next to "Go to
parent" and "New folder".
In both case, you should be presented with a modal similar to the following.
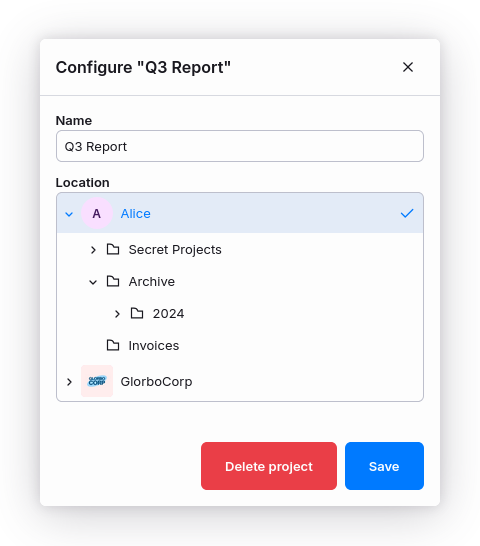
You can use it to rename or delete the project or folder, but most importantly to change its location. Unfold the folder hierarchy to find the new parent folder, and click on its name. Once it is highlighted in blue and has the checkmark icon on the right, press "Save", and you're done!
The other way to move a project or folder is to drag and drop them where you want to move them. Pick the item you want to move, click on it and hold the mouse button pressed. Zones that can become its new parent are highlighted with a blue outline: folders of course, but also the team icons in the left sidebar, path breadcrumbs at the top of the page, the "Go to parent" button, and the project list that is currently open.
Move your cursor over the desired destination, and release your click. The project or folder you selected will be moved. If you hold your click while your are over a potential destination, you will notice that the outline grows. After one second, you will be navigated to this location. This can be useful if you want to move a project in a deeply-nested folder: hold your click and move your cursor over the next folder to descend the hierarchy.
Finally, if you have opened a project in the editor, you can also open the settings panel by clicking the corresponding icon in the bottom left corner of the page, and change the project's location using the dedicated dropdown menu.
Deleting a folder
To delete a folder, you must first make sure it is empty. Move or delete any folder or project it contains
Once the folder to delete is empty, open its settings modal by clicking the "Folder settings" button. Click the red "Delete folder" button. There will be no further confirmation.